By Saskia | April 28, 2019
This 2nd part will cover the installation of R, RStudio and the Shiny Server and is based on R’s Ubuntu packages for R tutorial, the DigitalOcean manual, RStudio’s RStudio Server and Shiny Server guides, and Dean Attali’s great blog post.
Table of Contents - Part 2
Step 8: Some preparations
Before you can install R or anything else on your Ubuntu server you need to be logged in as your non-root user
$ ssh username@hostaliasThe next step is then to add a GPG key for Ubuntu’s Apt authentication for downloaded packages. GPG (GNU Privacy Guard) is the tool used in secure apt to sign files and check their signatures, while apt-key is the program that manages a keyring of gpg keys for secure apt.
This line of code adds the relevant GPG key in one step:
$ sudo apt-key adv --keyserver keyserver.ubuntu.com --recv-keys E298A3A825C0D65DFD57CBB651716619E084DAB9Alternatively do the key retrieval and add to the apt-key in 2 steps:
$ gpg --keyserver keyserver.ubuntu.com --recv-key E298A3A825C0D65DFD57CBB651716619E084DAB9
$ gpg -a --export E298A3A825C0D65DFD57CBB651716619E084DAB9 | sudo apt-key add -
(If none of that works, see here for more alternatives)
If you want to know more about Apt authentication read this entry on the Ubuntu Documentation.
Step 9: Install R and packages
9.1 R
To get the latest R packages for Ubuntu (at the time of writing it’s 3.6) we’ll start by adding the external repository maintained by CRAN to the etc/apt/sources.list file. If your droplet runs on Ubuntu 16.04.6 x64, as suggested in step 1.2, you need to add deb https://cloud.r-project.org/bin/linux/ubuntu xenial-cran35/ to the file. If you use a different Ubuntu version check here for the correct entry: https://cloud.r-project.org/bin/linux/ubuntu/README.html.
You have 2 options to add the repo:
Option 1: Using the add-apt-repository command
$ sudo add-apt-repository 'deb https://cloud.r-project.org/bin/linux/ubuntu xenial-cran35/'Option 2: By redirecting output to a file appending the redirected output at the end.
$ sudo sh -c 'echo "deb https://cloud.r-project.org/bin/linux/ubuntu xenial-cran35/" >> /etc/apt/sources.list'By using https://cloud.r-project.org, you will be automatically redirected to a nearby CRAN mirror.
Now we’re ready to install the complete R system. The following lines of code should look familiar to you from step 5.1 when installing nginx (except that we don’t set the -y flag this time):
$ sudo apt-get update
$ sudo apt-get install r-base
During the installation you will be asked if you agree with the disk space used by the program → type y
Check if you can run R by simply typing
$ RIf everything worked well you should have entered its interactive shell:
R version 3.5.2 (2018-12-20) -- "Eggshell Igloo"
Copyright (C) 2018 The R Foundation for Statistical Computing
Platform: x86_64-pc-linux-gnu (64-bit)

R is free software and comes with ABSOLUTELY NO WARRANTY.
You are welcome to redistribute it under certain conditions.
Type 'license()' or 'licence()' for distribution details.

  Natural language support but running in an English locale

R is a collaborative project with many contributors.
Type 'contributors()' for more information and
'citation()' on how to cite R or R packages in publications.

Type 'demo()' for some demos, 'help()' for on-line help, or
'help.start()' for an HTML browser interface to help.
Type 'q()' to quit R.

>
Quit R with quit()
9.2 R Packages
Before you install anything you might need to add some swap space for bigger memory to be able to install packages if you have chosen the cheapest droplet with 1GB memory (this is taken from Dean’s blog):
$ sudo /bin/dd if=/dev/zero of=/var/swap.1 bs=1M count=1024
$ sudo /sbin/mkswap /var/swap.1
$ sudo /sbin/swapon /var/swap.1
$ sudo sh -c 'echo "/var/swap.1 swap swap defaults 0 0 " >> /etc/fstab'
Also, if you want to install some packages as development version from GitHub you should install the ‘devtools’ package and all its dependencies. Some of these dependencies are not R packages so we will install them first and with code you should be familiar by now:
$ sudo apt-get -y install libcurl4-gnutls-dev libxml2-dev libssl-devNow you’re ready to install all R packages you need.
NOTE, there are 2 ways of installing packages in the root library so that they will be available to all users automatically.
- Start R as root and install libraries with the known
install.packages()function - Install straight from the shell using
sudo su - -c "R ... "
I will demonstrate both options in more detail now:
Option 1
Start R as root with
$ sudo -i RNow let’s install devtools, tidyverse, modelr, and lubridate within R’s interactive shell:
> install.packages(c("devtools", "tidyverse", "modelr", "lubridate"), dependencies = TRUE)You can see in the output where the packages will be installed
...
Installing package into ‘/usr/local/lib/R/site-library’
(as 'lib' is unspecified)
. . .
This location represents the global library and will make packages available to all users. It is only accessible because we ran R as root. If you would have started R as non-root user, the packages would have been installed in the user’s personal library (which has as location “/home/username/R/x86_64-pc-linux-gnu-library/R_version”).
Load any of the packages as test, try out some functions and then quit R, e.g.
> library(lubridate)
> month(ymd("2019-Dec-01"))
> quit()
Option 2
This code is a bit more intimidating. Let’s install rmarkdown, shiny, and shinyjs separately:
$ sudo su - -c "R -e \"install.packages('rmarkdown', repos='http://cran.rstudio.com/')\""
$ sudo su - -c "R -e \"install.packages('shiny', repos='http://cran.rstudio.com/')\""
$ sudo su - -c "R -e \"install.packages('shinyjs', repos='http://cran.rstudio.com/')\""
Now start R as your non-root user
$ Rand check if you have access to the packages you just installed in the global library:
> library(modelr)
> library(shiny)
You can see R’s search path for packages when calling the function .libPaths(). The first entry should be the path under the current user’s home, the second should be the root library where we just installed the packages. I see, for instance, when logged in as saskia:
> .libPaths()
[1] "/home/saskia/R/x86_64-pc-linux-gnu-library/3.5"
[2] "/usr/local/lib/R/site-library"
[3] "/usr/lib/R/site-library"
[4] "/usr/lib/R/library"
Step 10: Install RStudio Server
As a first step you need to install the gdebi-core package so that gdebi can install RStudio and all of its dependencies.
$ sudo apt-get -y install gdebi-coreNext, download the latest RStudio Server → check here for the correct version/file: https://www.rstudio.com/products/rstudio/download-server/ At the time of my installation it was version 1.1.463, released 2018-10-29, for 64bit Ubuntu:
$ wget https://download2.rstudio.org/rstudio-server-1.1.463-amd64.debNow use GDebi to install Shiny Server
$ sudo gdebi rstudio-server-1.1.463-amd64.debWhen you will be asked ‘Do you want to install the software package?’ type y.
Once the installation is finished, you should be able to log into your own RStudio Server from any Browser.
How? By simply adding the port number Rstudio uses (which is as default 8787) to your IP address or web domain, e.g. https://123.45.678.910:8787/
If everything worked well you should see this interface in your browser:
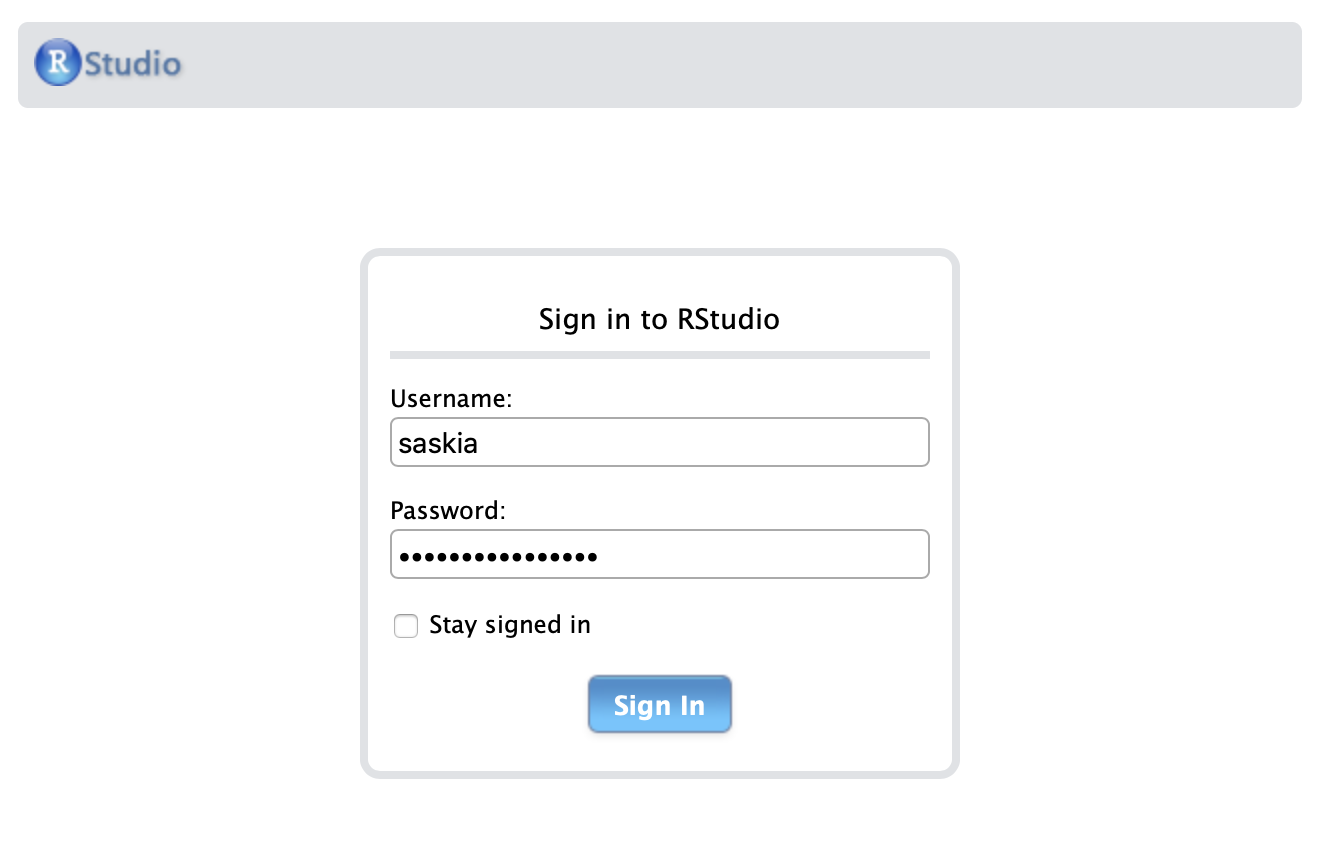
Any user that has been created in the droplet can access the RStudio Server with its username and password. If you want to share your server with others for collaboration, add the user in the terminal:
$ sudo adduser name_of_new_userYou can also define groups and assign users to the group:
$ sudo addgroup newgroup
$ sudo adduser name_of_new_user newgroup
For more information check also this website: https://www.digitalocean.com/community/tutorials/how-to-add-delete-and-grant-sudo-privileges-to-users-on-a-debian-vps
Step 11: Install and configure Shiny Server
11.1 Installation
If you haven’t installed the shiny package as root in step 9.2 you need to do this latest now.
$ sudo su - -c "R -e \"install.packages('shiny', repos='http://cran.rstudio.com/')\""Also, if the GDebi tool is NOT installed yet because you skipped the RStudio installation you need to do it now:
$ sudo apt-get -y install gdebi-coreTo install the latest Shiny Server we need to download the correct file for your OS as we did for RStudio Server. Check the Shiny Server download page for the appropriate URL: https://www.rstudio.com/products/shiny/download-server/
At the time of my installation the version was v1.5.9.923 and the 2 commands required for 64bit Ubuntu 14.04 or later were (but again, check on the webpage for the latest version and URL):
$ wget https://download3.rstudio.org/ubuntu-14.04/x86_64/shiny-server-1.5.9.923-amd64.deb
$ sudo gdebi shiny-server-1.5.9.923-amd64.deb
(confirm installation)
Once the installation finished, you can test the server using the default port 3838:
https://123.45.678.910:3838/ (again, replace this dummy IP 123.45.678.910 with your server IP).
If all went well you should see this welcome page with 2 example shiny apps. Try them out and read the welcome text as it provides some useful information worth reading!

runtime::shiny to the file’s YAML header.
11.2. A brief Shiny Server overview
- All shiny apps and the Shiny Server homepage are located in the root directory
/srv/shiny-server/, which means that you can only make changes to these files using the sudo command when logged in as non-root user. To change the homepage file in the editor or remove it completely you’d need to type
$ sudo nano /srv/shiny-server/index.html
$ sudo rm /srv/shiny-server/index.html
→ but we will change that in a bit!
- Each shiny app or interactive R Markdown document and its supporting files should be saved in a separate folder under this directory. You can also group several shiny app folders into one → to access the app in the browser you would simply add the subdirectory to the IP address.
- For instance, the embedded It’s Alive app above is located in the folder
hello - which is together with the Shiny Doc R Markdown document in the
sample-appsfolder, - hence, the full path is
/srv/shiny-server/sample-apps/hello. - Since the port 3838 directs the user already to the /srv/shiny-server/ folder you only need to add the subdirectory /sample-apps/hello to the IP address.
- Try it out:
https://123.45.678.910:3838/sample-apps/hello(replace with your server IP) - So choose your folder names carefully (e.g. don’t use blanks).
- For instance, the embedded It’s Alive app above is located in the folder
- The configuration files are located in the
/etc/shiny-serverdirectory, which we will soon access. - All Shiny Server log entries are saved in
/var/log/shiny-server.log.
11.3 Configuration
You can make sure that all log files will be saved and informative errors printed for debugging by adding a few lines to the shiny server configuration file. Open the shiny-server.conf file with an editor:
$ sudo nano /etc/shiny-server/shiny-server.conf→ here you could also change the port number in the server definition.
After the server definition add these 4 lines (incl. the comments so you know what for):
# To make sure that shiny log files will always be preserved
preserve_logs true;
# To make sure that informative error messages are printed
sanitize_errors false;
You might notice that apps are run as user shiny and not as root our your non-root user (in my case saskia). This means that all packages a shiny app loads need to be available for that user, which is why it is so crucial to install packages in the global library and not redundantly on a user-basis. As a solution you could add your non-root user to the config file by adding this line
run_as username;But then it might be difficult to distinguish between you using the server’s resources or a shiny user playing with your app. There is another alternative I’ll describe next so let’s NOT add this line of code, save the file and exit.
You must reload the shiny server after editing the config file:
$ sudo service shiny-server restartStep 12: Replace the port number to have an easier URL
If you have already changed the default server’s IP address by your custom web domain you probably would like to add something else than the 4-digit port number to access your RStudio and Shiny Servers. This can be easily done with only a few additional lines of code in your nginx config file (the following is based on Dean Attali’s blog post):
Open the nginx default config file with the nano editor
$ sudo nano /etc/nginx/sites-enabled/defaultLook for the line that reads server { and place above that line the following:
map $http_upgrade $connection_upgrade {
  default upgrade;
  ''      close;
}
Then look for the line that reads server_name _; and place right after in a new line the following lines:
location /shiny/ {
  proxy_pass http://127.0.0.1:3838/;
  proxy_http_version 1.1;
  proxy_set_header Upgrade $http_upgrade;
  proxy_set_header Connection "upgrade";
  rewrite ^(/shiny/[^/]+)$ $1/ permanent;
}

location /rstudio/ {
  proxy_pass http://127.0.0.1:8787/;
  proxy_http_version 1.1;
  proxy_set_header Upgrade $http_upgrade;
  proxy_set_header Connection "upgrade";
}
The 3 lines after each proxy_pass line fix a few issues by allowing nginx to proxy WebSockets. The rewrite command allows to write the URL with and without trailing slashes.
Note, the IP address 127.0.0.1 is NOT the droplet’s IP address and should be therefore not replaced with your own IP. Just copy the above lines with no further changes and paste them into your config file!
proxy_set_header Connection $connection_upgrade;) failed when running the certbot’s auto-renewal of the SSL certificate ( I got the error message that the “connection_upgrade” variable was not found). I fixed it by changing this line to proxy_set_header Connection "upgrade"; as I had it for the shiny location.
Restart nginx again:
$ sudo service nginx restartTest your changes and go to https://123.45.678.910:shiny/ or https://123.45.678.910:rstudio/ (replace the IP address with your droplet’s IP our your own domain)
My servers are now accessible at:
Step 13: Fill your Shiny Server with shiny apps
There are different ways to add apps and files to your Shiny Server, some of them are obviously more convenient than others:
Option 1: From the shell
Let’s say you developed within your new R Studio Server a shiny app that you saved in a folder called hello, which is located right in your R home directory. You could then copy the files from the R directory to your Shiny directory in the shell using the cp command.
Open the terminal and log into your droplet, then type
$ sudo cp -r /home/your_username/R/hello/ /srv/shiny-server/NOTE: The -r flag for the copy command is important: it stands for recursive and means that ALL files within that folder will be copied too!
To move the entire folder use
$ sudo mv -r /home/your_username/R/hello/ /srv/shiny-server/Now test your shiny app in the browser: https://123.45.678.910:shiny/hello
Alternatively, you can use the scp command, which is a file transfer program for SFTP in Linux. SFTP stands for SSH Secure File Transfer Protocol and supports the full security and authentication functionality of SSH. It uses the same port as the SSH port so there is no need to configure another hole into the firewall.
The scp usually comes with the OpenSSH package. Once you’re logged out of your droplet type
$ scp -r username@hostalias/home/your_username/R/hello/ username@hostalias/srv/shiny-server/Option 2: Connect to your droplet using a file manager
Depending on your operating system you have various choices of file managers that also serve as SFTP clients. Here are some examples:
I personally use on my Macs for many years Forklift and I love it. Not only that it is a much nicer file manager than the default finder, I can also easily connect to my droplet. And once I’m connected I can treat the droplet directory as any other external hard drive. So I can simply drag and drop files from my computer to the droplet and vice versa.
I only needed to set up the connection once by clicking on Go To > Connect and then a dialog box pops up:
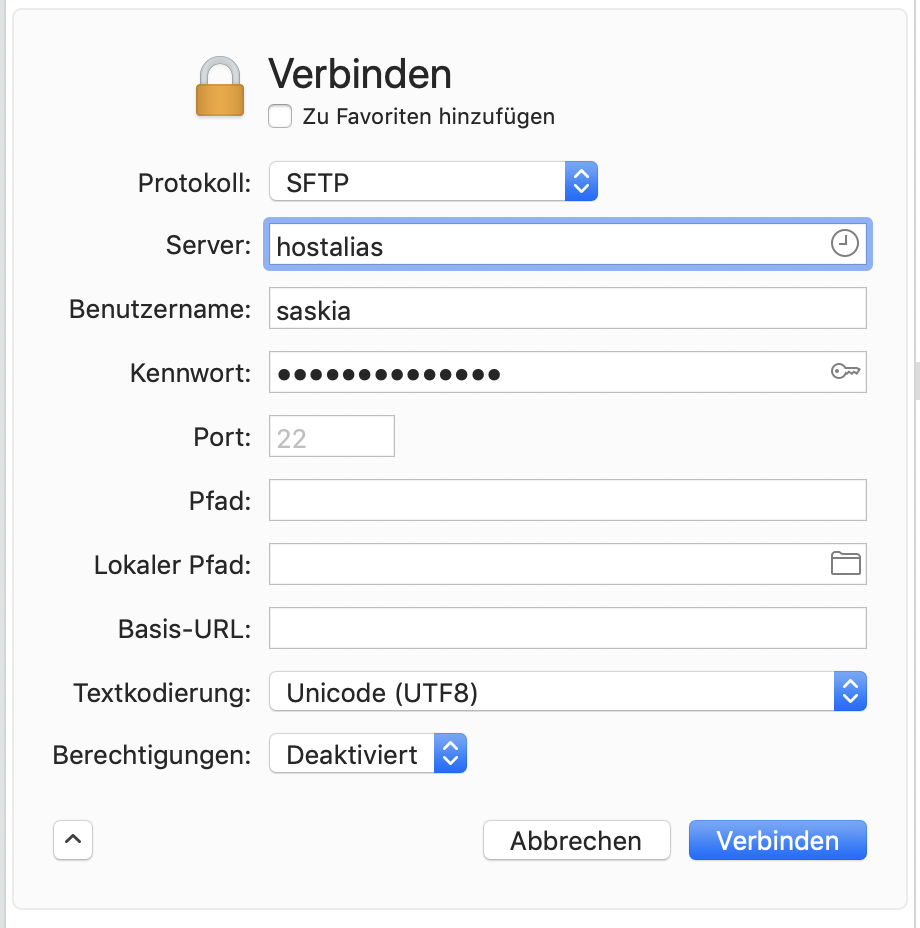
Select SFTP as protocol, enter the droplet’s hostalias you defined in step 2.5, your username and password and the port number if is not the default. You can even add this connection to your favorites and have access to it anytime!
Option 3: Connect through git
Last but not least you can convert your /srv/shiny-server directory into a git repository so that you can push your apps or any other file to this repo from your computer. If you then do a git pull on your droplet the new app will be on the server.
If you want to go this track I recommend that you follow these instructions.
Congratulations, you’re all set now! Have fun with your very own Shiny Server!.